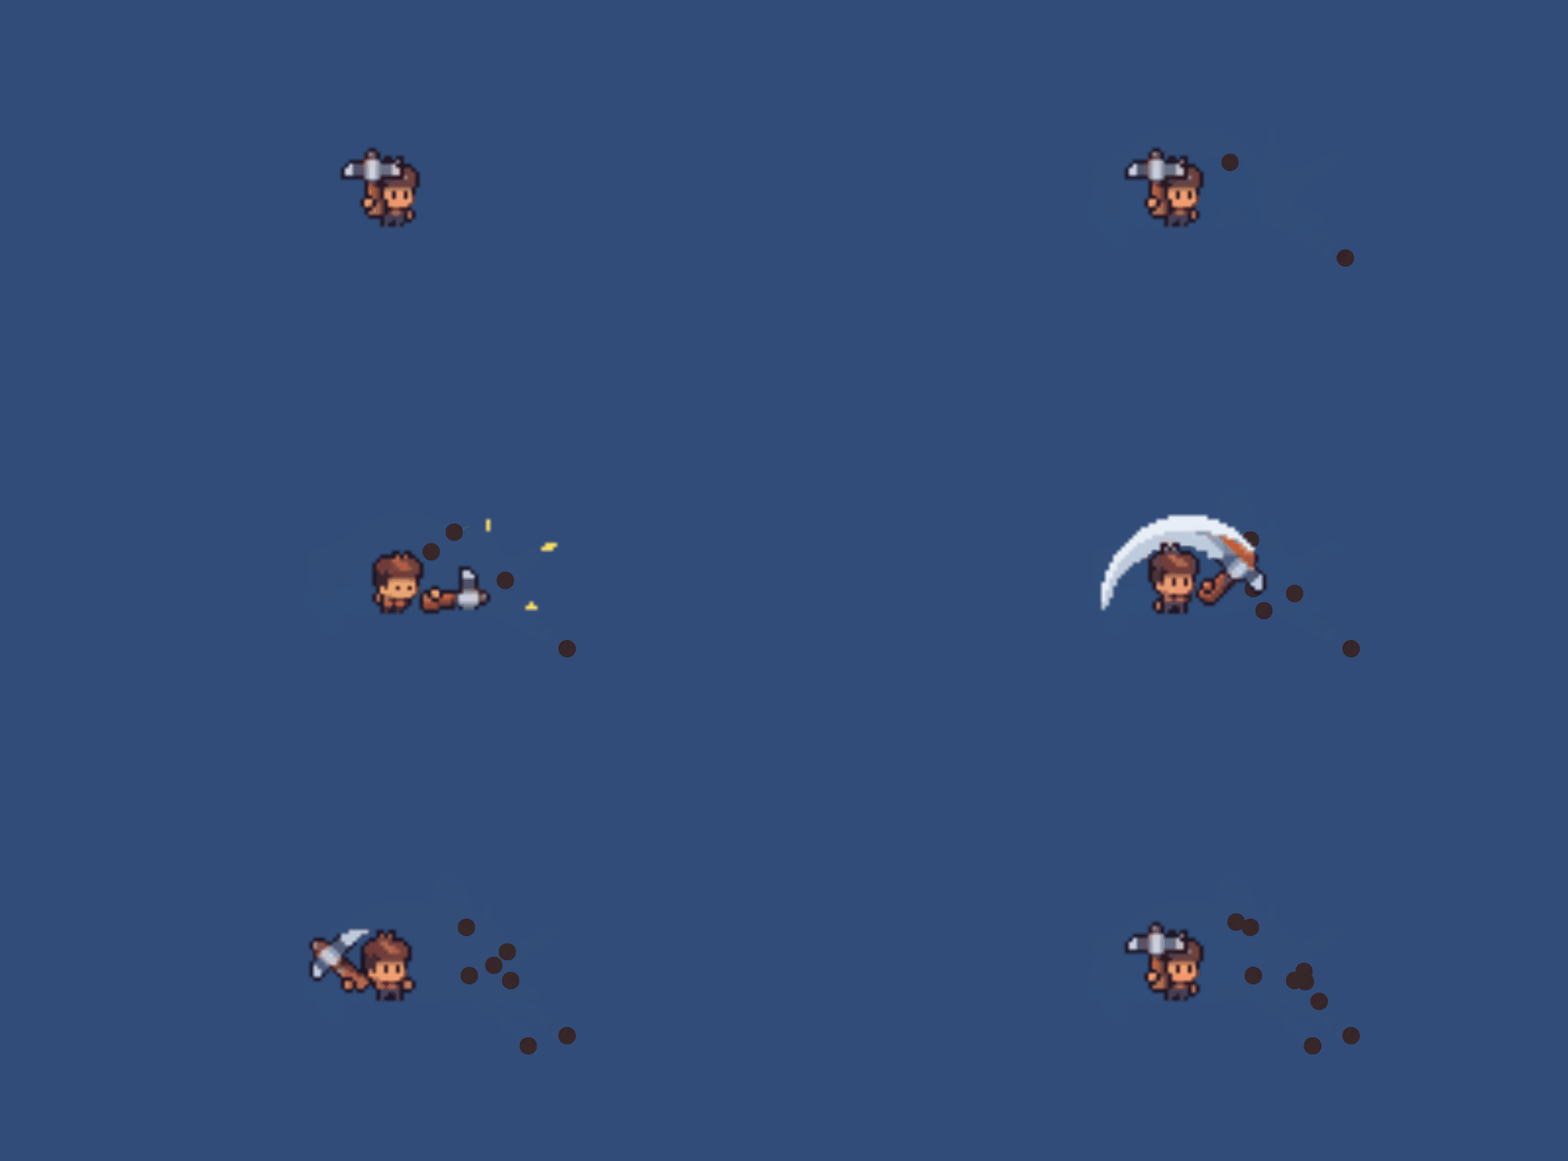
Loading in a sprite (2d image) and actually animating it in-engine is actually pretty straightforward but the first time can be a hassle to learn as it’s many tiny steps.
The steps we’re going to take are:
- Load in a Sprite Sheet
- Splice the Sprite Sheet into individual parts
- Create a Sprite Render on our Game Object
- Create an animation clip (which will add an Animator to our Obj)
- Adjust the animation clip until we’re happy
- And as a bonus add an event trigger to spawn objects
For the artwork, I’m using the art pack Sunnyside World purchasable on itch io
1. Load in a Sprite Sheet
A sprite sheet is simply a collection of 2d images contained in one .png file. The norm is loading all animations and having one animation sequence per row but for this demo we’ll just be loading one strip.
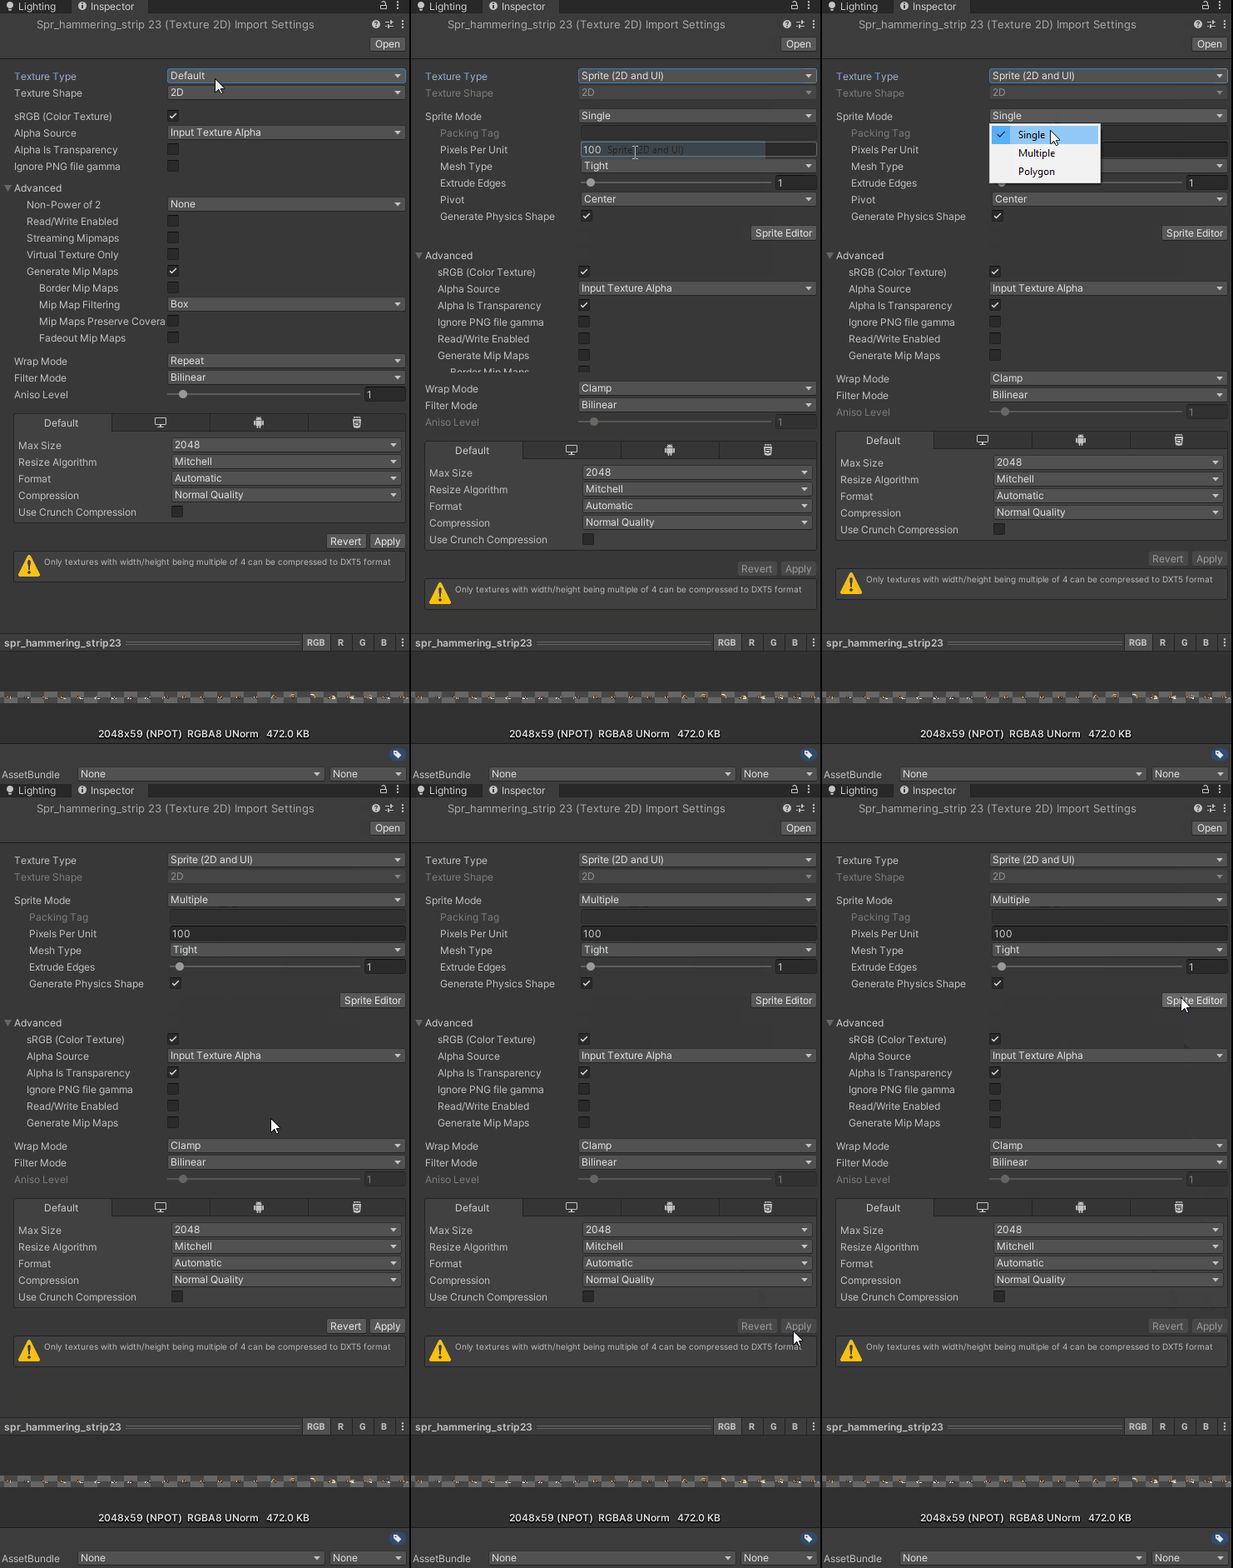
We need to-do some settings though, namely making sure the .png file is set to Sprite type and that the sprite mode is “Multiple”. Then we click the Sprite Editor todo our slicing. If you don’t have these options you likely did not install Unity2D packages.
2. Splice the Sprite Sheet
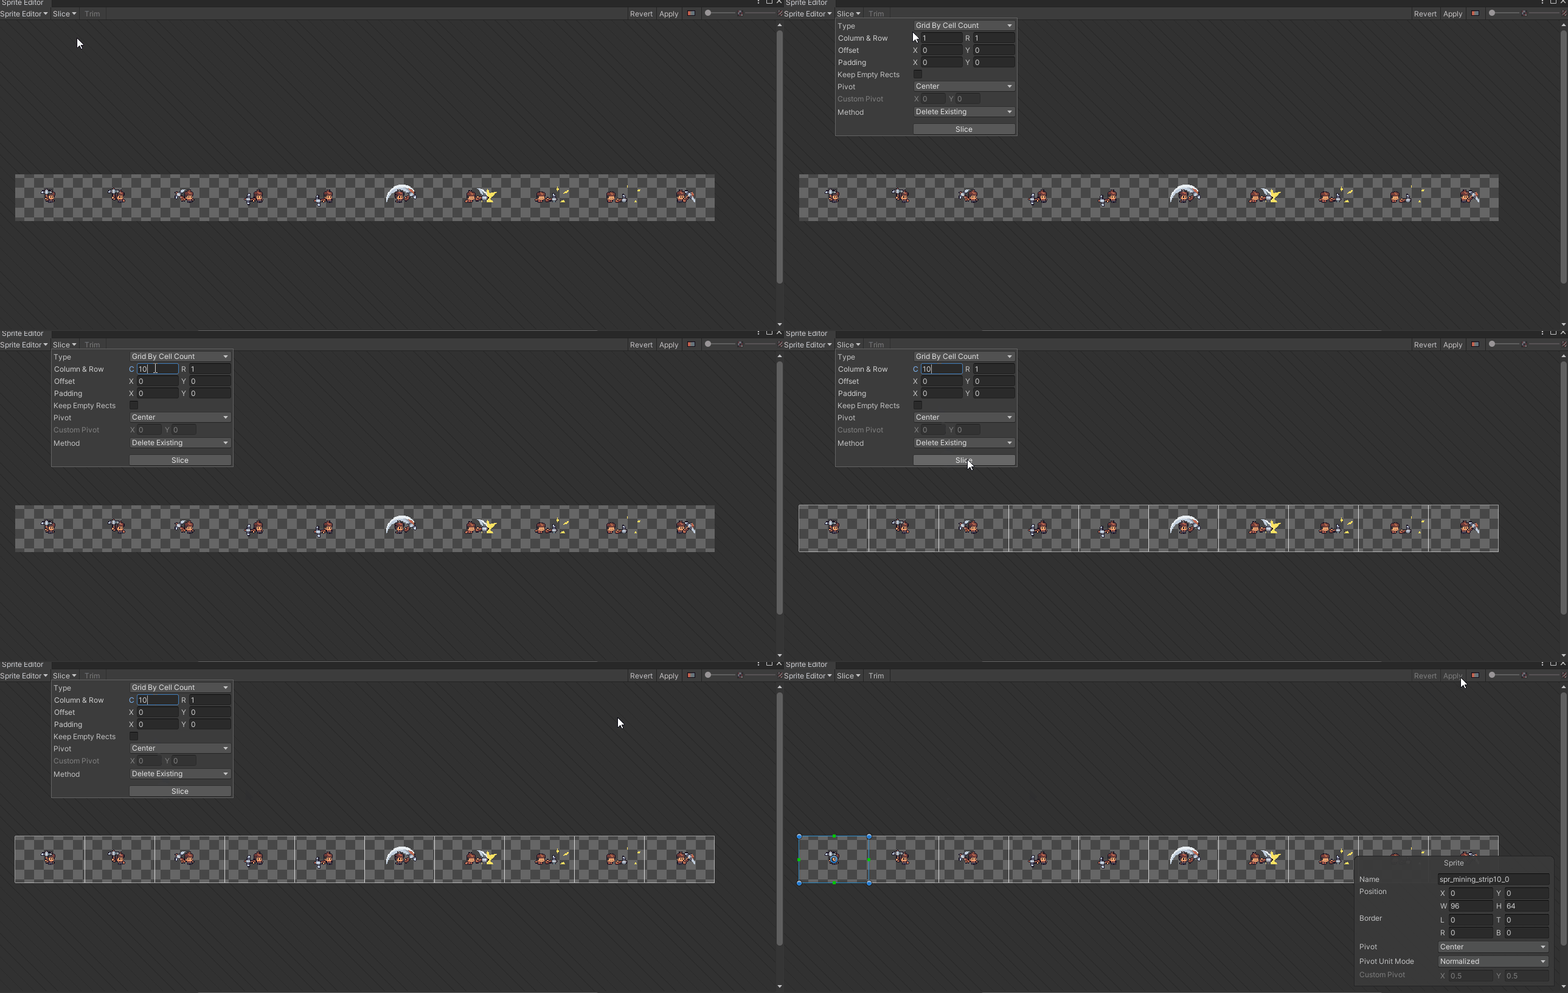
After clicking sprite editor, this window will pop up. From here we can manually select the sprite sizing or we can use auto or grid style slicing. For the demo, I’m just going to go ahead and slice these 10 frames using Grid by Cell Count. We have to hit apply to save our changes before closing the window else we’ll get a warning to save the changes.
3. Create a Sprite Render on our Game Object
Now we just add a Sprite Render to our game object, in my case a player. Then we click the bullseye icon to find our desired sprite. I’m using the Mining animation strip. You can see the individual frames, I want to select frame Zero (ends with _0) as that's the start of the animation.

4. Create an Animation Clip
Next up is creating an animator clip, the easiest way is to open up the animation window. Ctrl+6 or see below.

From here we can see the animation window and if we have our player object selected we can go ahead and click the “Create Animation” and save the animation clip where we want to in our project.
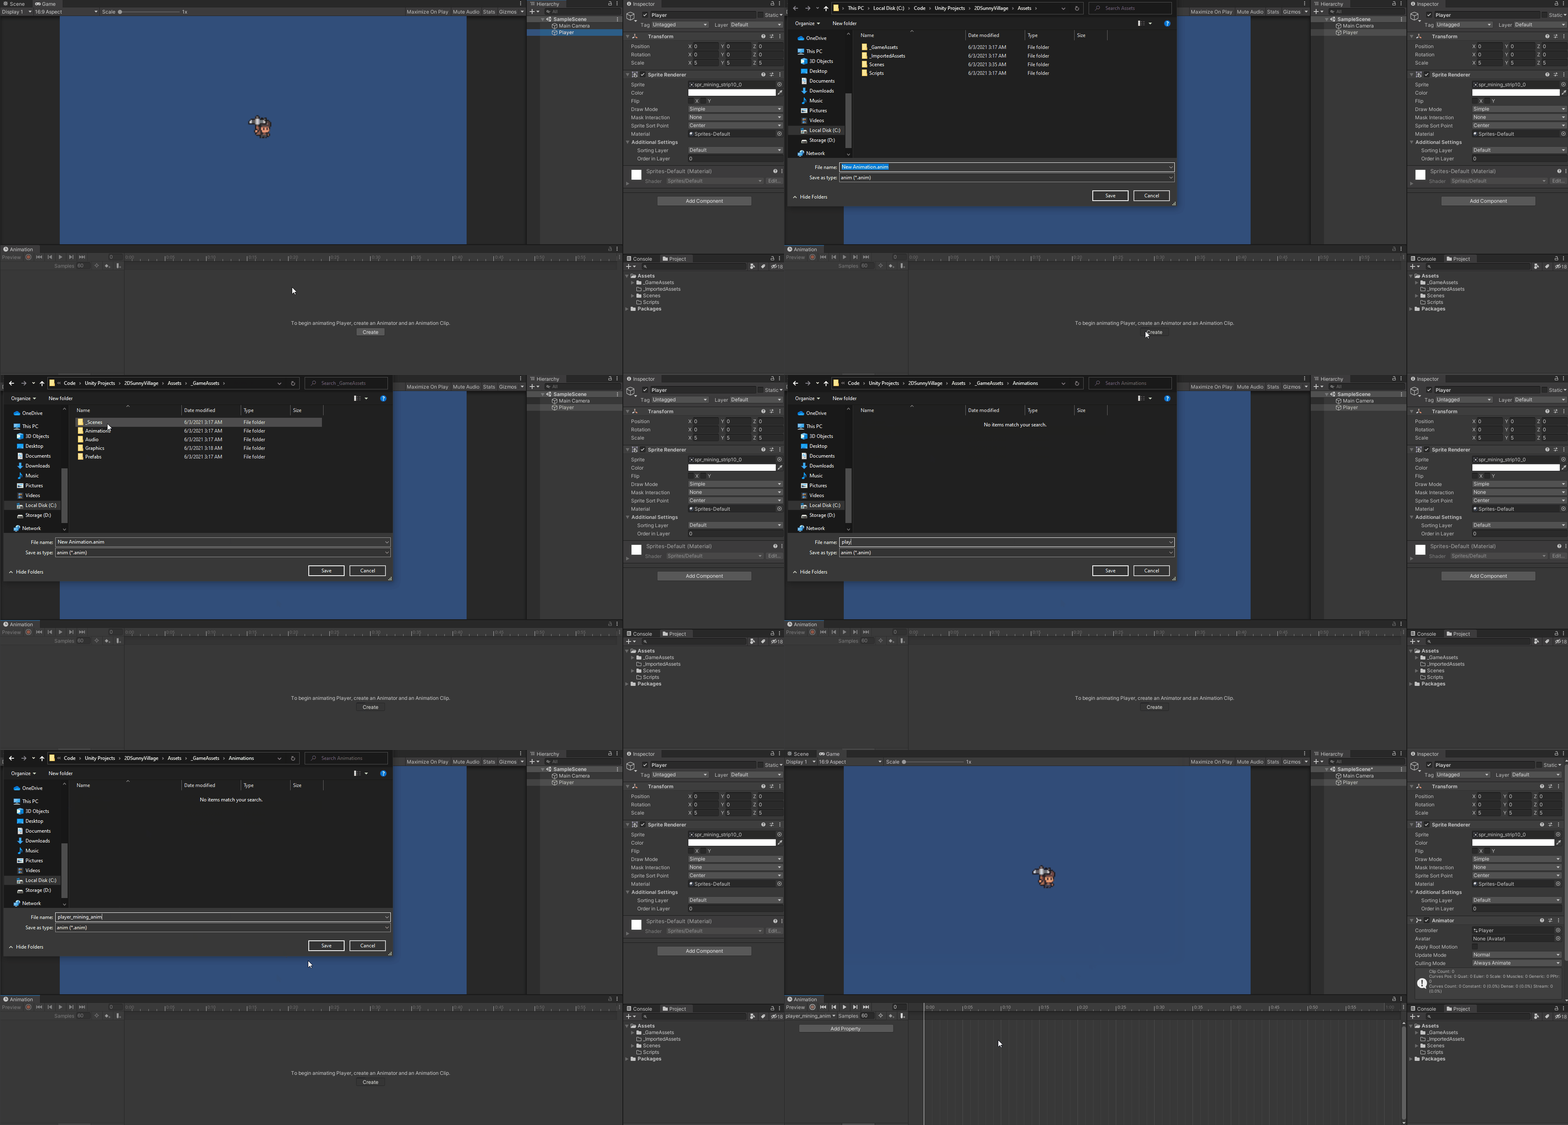
This will also automatically add an Animator to our game object, and create a PlayerController assigned to the animator. If we double click on PlayerController it will load the Animator window (not to be confused with the Animation Timeline we just worked with).
This is where we can use Mecanim to create our Animation State Behaviors. Which is a whole other topic but just know it exists and it’s how the clip is starting and looping.

5. Adjust the animation clip until we’re happy
Now we need to add all the individual sprites into the animation timeline, and then adjust it until we’re happy.
For this demo, I’m just reducing the sampling to 25 fps (the old PAL standard) which gets it to where I need it with my assets. There’s a lot of options you can do within the Unity Animation Timeline window though, so look up Unity Learn or within the Unity Docs for hours of content on just the timeline controls.
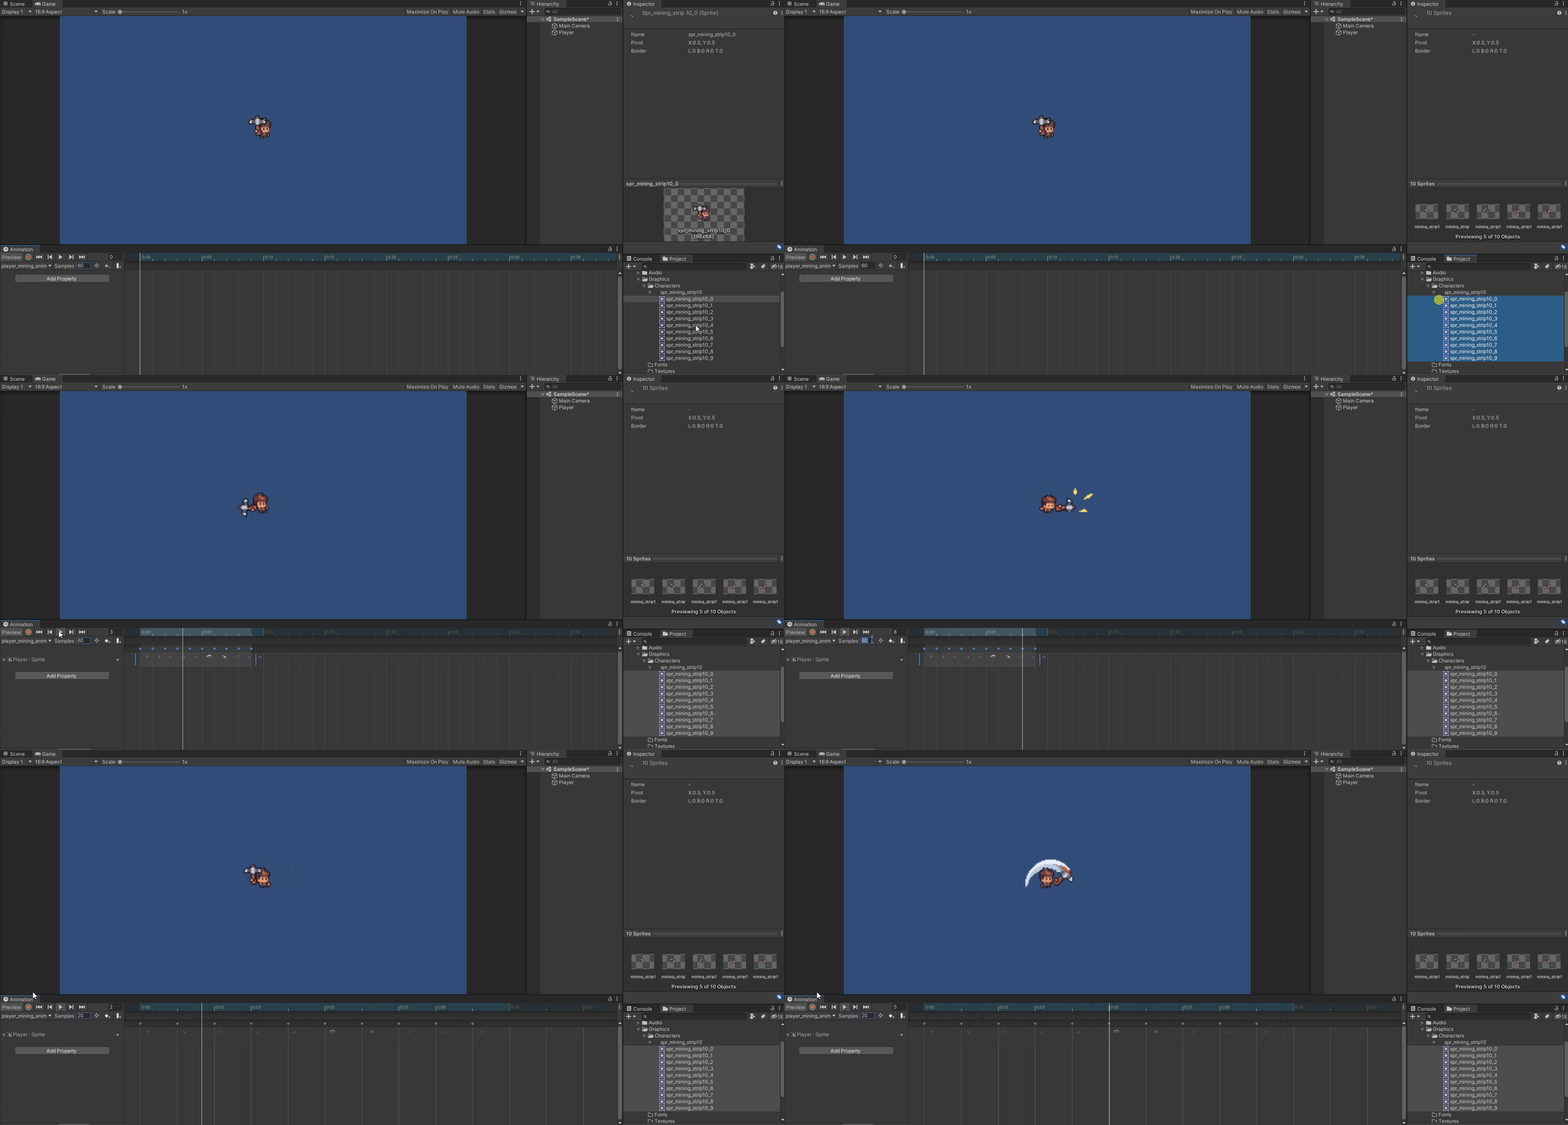
6. Bonus: add an event trigger to spawn objects
Now our animation is done, we can just hit play and watch it go. But at times we want specific events to trigger such as OnOreHit() as the pickaxe hits the ground.
As mentioned before the Animation Timeline window is amazingly powerful and it has event triggers. First, we need to add the code to expose a function for the event to use, then we add the event trigger on the frame we want it.

Now to add the event trigger. Click the frame you want, click the Add Animation Event button on the far left. This creates a white flag on the frame, click it and it will turn blue as shown below, and it’ll open the Animation Event. From there just select the function you want, in my case OnOreHit(). There can be of course a ton of additional code to check if there was ore and all that, but for example’s sake, we’ll just pretend a rock is there.

And then we can see the full result of the ore spawning.
